Every 3D animation you have ever watched, whether it was a two-minute product explainer or a feature-length film, passed through the same set of production stages. The software changes. The team sizes change. The budgets vary enormously. But the sequence of decisions, from initial concept to final rendered output, follows a consistent logic that professional studios have refined over decades.
Understanding the 3D production pipeline is not just useful for animators. It is useful for any brand, marketing director, or creative lead commissioning 3D content. When you understand the pipeline, you know where your decisions have the most leverage, which changes are cheap and which are catastrophic, and how to be a better collaborative partner to the studio producing your work.
This guide walks through the complete animation production pipeline as it operates in professional studios today.
What Is a 3D Animation Pipeline?
A 3D animation pipeline is the structured sequence of stages that a 3D animation project passes through from initial brief to final delivery. Each stage in the pipeline has a defined purpose, a set of deliverables, and a point at which the output is reviewed and approved before the next stage begins.
The pipeline exists to manage complexity. A single minute of finished 3D animation may contain thousands of individual production decisions: model geometry, rig controls, texture maps, shading settings, lighting configurations, animation curves, physics simulations, render passes, and compositing layers. Without a structured pipeline, managing all of those decisions simultaneously would be impossible.
The pipeline also manages financial risk. Decisions made in early stages cost very little to change. Decisions made in the late stages can be costly to change. The pipeline is designed to surface the most consequential decisions as early as possible, when they are still cheap to resolve.
The Three Major Phases of 3D Animation Production
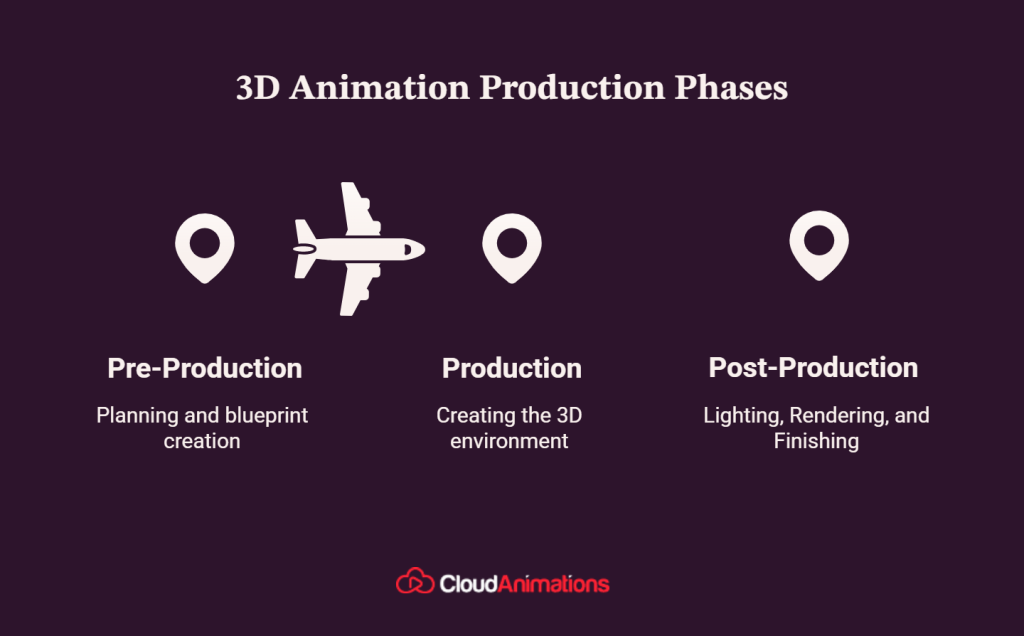
The 3D animation workflow is divided into three broad phases, each containing multiple sub-stages:
- Pre-production: Everything that happens before animation begins
- Production: The creation of all animated content
- Post-production: Rendering, compositing, and delivery
Pre-Production: Building the Blueprint
Creative Brief and Concept Development
Every 3D animation project begins with a brief. Before any software is opened, the studio and client need shared clarity on a set of foundational questions:
What is the video trying to accomplish? (awareness, conversion, education, entertainment)
Who is the audience, and what do they already know?
What is the single most important thing the viewer should understand or feel after watching?
Where will the video be deployed, and what are the format requirements?
What is the visual reference for tone and style?
The answers to these questions shape every downstream decision in the production pipeline. A product animation targeting investors needs different visual choices than the same product animation targeting end consumers. Getting clarity on the brief early prevents misalignment at expensive stages later.
Script and Storyboard
Once the creative direction is established, the project moves to script. For explainer videos and brand films, the script is written and revised until the core message is sharp and the timing is correct. For purely visual animations with no dialogue, the script may be a shot list or a narration track.
The script feeds directly into the storyboard, where a visual artist draws every significant shot in the sequence. The storyboard is the first visual representation of the finished video and the primary tool for reviewing shot composition, story structure, and visual flow before 3D animation video production begins.
Animatic
The storyboard panels are assembled into a timed video sequence with temporary audio, producing the animatic. This is the stage where pacing is established and approved. Shot durations, cut points, and audio timing are all locked at the animatic stage.
The animatic is also the last point in the 3D pipeline where structural changes can be made at low cost. Once the animatic is approved and production begins, changing the story structure requires rebuilding production work, which adds time and budget.
Concept Art and Style Frames
Before 3D modeling begins, concept artists produce visual development artwork: detailed illustrations of key characters, environments, and props. Style frames show how specific shots will look in the finished animation, demonstrating the intended lighting, color palette, and visual mood.
Style frames are critical alignment tools. They give the client a clear visual reference for what they are approving, and they give the 3D artists a target to match during production.
Asset List and Production Plan
The production team reviews the storyboard and concept art to produce a complete asset list: every character, environment, prop, and effect that will need to be created. The asset list feeds into the production schedule, determining how team members are allocated and when each stage will be completed.
Cloud Animations invests in rigorous pre-production on every project, because the decisions made before a single model is built determine whether the final animation delivers results. Talk to our team about how our pipeline protects your project and your budget.
Production: Building the 3D World
Modeling
3D modeling is the process of building the three-dimensional geometry of every element in the animation: characters, props, environments, and any other physical object that will appear on screen.
Modeling begins with the concept art as reference. Artists work in polygon modeling software, building objects from basic geometric shapes that are progressively refined. A character model starts as a rough blocky form and is refined over multiple sessions until it matches the concept design in proportion, detail, and topology.
Topology matters more than most clients realize. Topology refers to the structure of the polygon mesh, how the polygons are arranged and connected. Good topology ensures that the model deforms correctly when animated. A model with poor topology may look fine as a static object, but it will collapse or produce skin-tearing artifacts when the rig moves it. Professional studios build character models with animation-ready topology from the start.
Hard surface vs. organic modeling uses different approaches. Hard surface modeling, for products, vehicles, and environments, typically uses precision geometry and clean edges. Organic modeling, for characters and creatures, uses softer edge flow that follows the curves of the body and allows natural deformation.
Rigging
A rig is the control system inside a 3D character model that allows animators to pose and move it. Without a rig, a 3D character model is a static object. With a rig, it is a puppet.
Rigging involves creating a hierarchical skeleton of joints that are bound to the character model’s mesh. When a joint moves, the mesh deforms accordingly. The rigger also creates control objects, visual handles placed at key points on the character, that animators use to pose the character without manipulating the skeleton directly.
The quality of a rig directly determines the quality of the animation that can be achieved with it. A well-built rig gives animators intuitive control over every part of the character and behaves predictably under extreme poses. A poorly built rig fights the animator, producing unpredictable deformations and limiting the expressiveness of the performance.
Texturing and Shading
Texturing is the process of creating the surface appearance of 3D models: color, detail, surface roughness, reflectivity, and other material properties. Texture artists create image maps in programs like Adobe Substance Painter or Photoshop, which are then applied to the 3D model’s surface.
Shading is the process of defining how a surface material responds to light. A shader controls properties including:
Albedo (base color): The color of the surface
Roughness: How matte or glossy the surface appears
Metallic: Whether the surface behaves as a metal or a non-metal
Normal map: A map that creates the illusion of surface detail without adding geometry
Specular: How bright and sharp the surface’s reflections are
Modern 3D rendering uses physically based rendering (PBR) shaders, which are calibrated to respond to light in the same way real-world materials do. A PBR shader for painted metal will produce different results under different lighting conditions in exactly the way a real painted metal surface would.
Environment and Set Building
While characters are being modeled and rigged, environment artists build the spaces that those characters will inhabit. Environments in 3D animation range from highly detailed, photo-referenced real locations to entirely fictional worlds with their own visual logic.
Set building involves modeling the architecture, props, and surface materials of the environment, lighting the space with preliminary lighting passes, and integrating any interactive elements that characters will engage with.
For product animations, the environment is often minimal by design: the product is the focus, and the surrounding space exists primarily to provide lighting context and reinforce brand aesthetic.
Animation: Making It Move
Layout and Camera Work
Before animation begins, the layout artist places characters and props in the scene according to the storyboard and animatic, establishes camera positions and movements, and confirms that everything is staged correctly in three dimensions.
Layout is the 3D equivalent of the storyboard’s 2D composition planning. It converts the 2D panel drawings into a real 3D spatial configuration and confirms that the camera will capture the action correctly.
Character Animation
Character animation is the most creatively demanding stage in the process of 3D animation. The animator takes the approved layout and brings the characters to life, using the rig controls to create pose-by-pose performance.
Professional character animation follows the same principles established in traditional cel animation: anticipation, follow-through, squash and stretch, secondary action, and precise timing. These principles apply regardless of whether the animation is realistic or stylized, comedic or dramatic.
The 3D animation process typically follows a staged approach:
Blocking: Setting the major key poses at wide intervals to establish the broad timing and performance
Spline pass: Connecting the key poses with interpolated motion and addressing major timing and trajectory issues
Polish pass: Refining secondary motion, adding overlap and follow-through, and fine-tuning every curve until the performance is complete
Effects Animation
Effects (FX) animation covers all the non-character, non-environment elements that bring physical reality to a 3D scene: particle systems for fire, smoke, and dust; fluid simulations for water, blood, and viscous materials; cloth and hair simulations; rigid body dynamics for object collisions and destruction.
FX animation is computationally intensive and requires specialized expertise. The simulations are run, reviewed, adjusted, and re-run until they match the intended look. Many studios have dedicated FX artists whose entire focus is on simulation quality.
From model to render, Cloud Animations manages every stage of the 3D animation pipeline with the same level of craft attention. Every decision in our production process is made in service of one goal: animation that works. Start your project with us.
Post-Production: Lighting, Rendering, and Finishing
Lighting
With animation approved, the scene moves to final lighting. The lighting artist places light sources, configures their properties, and renders test frames to evaluate the visual result. Lighting is iterative: the artist assesses each test render, adjusts parameters, and re-renders until the scene achieves the intended mood and visual quality.
Professional 3D lighting uses a multi-pass approach, rendering separate image layers for different lighting contributions (key light, fill light, bounce light, ambient occlusion, specular highlights) that are combined in compositing. This approach gives compositors granular control over the final image without requiring full re-renders for each adjustment.
Rendering
Rendering is the computational process by which the 3D scene is converted into a sequence of 2D images. The rendering engine calculates how light interacts with every surface in every frame, applying the shading, texturing, and lighting configurations to produce the final visual output.
High-quality 3D rendering is computationally intensive. A single frame of complex 3D animation can take minutes or hours to render on a powerful workstation, depending on scene complexity, lighting setup, and render quality settings. Studios use render farms, networks of many computers working simultaneously, to render sequences at the necessary speed.
Common rendering engines in professional 3D animation production include:
| Engine | Common Use Case | Associated Software |
| Arnold | VFX, high-quality animation | Maya, Cinema 4D |
| V-Ray | Architectural visualization, product | Most major 3D packages |
| Redshift | GPU-accelerated production rendering | Maya, Cinema 4D, Houdini |
| Cycles | Independent and mid-budget production | Blender |
| RenderMan | Feature film | Maya, Katana |
Compositing
Compositing is the process of combining rendered image layers with each other and with any additional visual elements, color grade, motion graphics, visual effects, or live-action footage, to produce the final output image.
In compositing, artists can make precise adjustments to individual lighting passes, add lens effects, apply color grading, integrate 2D motion graphics, and add any visual elements that are more efficiently created in 2D than in 3D. The compositing stage is where the final visual look of the animation is refined.
Sound Design and Audio Post-Production
Simultaneously with compositing, audio post-production finalizes the sound design. Professional voice recording is finalized. Foley artists record any diegetic sound effects needed to give the animation physical presence. Music is mixed and synchronized. All audio elements are combined and mastered to delivery specifications.
Delivery and Format Optimization
The final stage of the animation pipeline is encoding and delivery. The composited video is exported in the formats required for each deployment context: broadcast specifications for television, web-optimized formats for social media, and high-resolution masters for archival and future use.
Professional delivery includes multiple format exports sized and compressed for specific platforms, quality checks on all deliverables, and handover of source files according to the agreed contract terms.

Mark Wilson
Mark is a Senior Content Marketer with 7+ years of experience in growing B2B, B2C, e-commerce, SaaS, & Digital Design Brands. He’s a polished writer, SEO geek, optimist at heart & good at playing table tennis.
Get the week’s best
marketing content

How to Work Effectively with a 3D Animation Studio
Understanding the pipeline gives you practical advantages when commissioning 3D animation:
- Make big creative decisions early. Changes to character design, story structure, and visual direction are inexpensive in pre-production and very expensive in production. Use the brief, storyboard, and animation stages to resolve all major creative questions.
- Review deliverables at each gate. Professional studios present client deliverables at the end of each production stage. These reviews are opportunities to identify and resolve issues. Declining to review deliverables at these gates or approving them without careful review passes problems downstream, where they cost more to fix.
- Distinguish between structural feedback and aesthetic feedback. Structural feedback (a character’s design is wrong, a scene is confusing, the pacing is too slow) is appropriate at the modeling, storyboard, and animatic stages. Aesthetic feedback (the color feels slightly off, the music could be a bit warmer) is appropriate at the compositing and final review stages. Mixing these feedback types disrupts the pipeline.
Ask about source file delivery. At project completion, confirm whether you receive source files along with the rendered output. Source files allow future updates without rebuilding from scratch. Studios vary significantly in their source file policies.
What Separates Good 3D Animation from Great 3D Animation?
Understanding the pipeline is one thing. Understanding what makes the output of that pipeline genuinely excellent is another. At every stage of 3D animation production, there is a difference between technically correct and artistically compelling. A model can be topologically sound and still feel lifeless. A rig can function without errors and still produce stiff, mechanical movement. A render can be technically clean and still feel emotionally flat.
The best 3D animation production, the kind that stops viewers mid-scroll and communicates its message in the first five seconds, comes from studios where craft decisions are made with intent at every stage of the pipeline.
What to Look for in a Studio’s Portfolio?
When evaluating 3D animation studios, the pipeline knowledge gives you a sharper framework for assessment:
- Modeling quality is visible in the surface detail of objects and the way materials catch light. Models that look flat in direct-light conditions or reveal low-polygon geometry under movement are signs of insufficient modeling investment.
- Animation quality is visible in the weight and personality of character movement. Does the animation have anticipation and follow-through? Do secondary elements like hair, clothing, and small props respond naturally to primary movements? Mechanical, puppet-like movement is the most common quality failure in mid-budget 3D animation.
- Lighting quality is visible in the depth and dimensionality of scenes. Flat lighting, which eliminates shadow depth and volume, is a quality indicator that distinguishes studios that treat lighting as a finishing step from those that treat it as a foundational creative decision.
Rendering quality is visible in the surface behavior of materials. Metals should reflect their environment. Skin should have subsurface translucency. Matte materials should respond to bounce light from their surroundings. Materials that look the same regardless of their lighting environment indicate insufficient attention to physically based shading.
The Investment in Pre-Production Pays for Itself
The single most important quality insight for brands commissioning 3D animation is this: the money spent on pre-production is the highest-leverage investment in the entire budget.
A thorough brief, a precise script, a carefully reviewed storyboard, a detailed animatic, and a set of approved style frames eliminate the most expensive category of problem in 3D production: the late-stage structural change. Studios that invest in pre-production systematically deliver projects on time, on budget, and to brief. Studios that rush pre-production in order to begin production sooner almost always pay for that shortcut in overruns, revisions, and disappointing final quality.
Cloud Animations was built around this principle. Every project begins with a pre-production phase that gives the client and the production team complete shared clarity before a single model is built. That alignment is how we deliver 3D animated content that performs, not just content that looks good in a preview.
Get your Free 30 Minute strategy
session with an experienced digital animators
Frequently Asked Questions
Q: What is the 3D animation pipeline?
The 3D animation pipeline is the structured sequence of production stages that a 3D animation project passes through from initial concept to final delivery. It includes pre-production (brief, script, storyboard, animatic, concept art), production (modeling, rigging, texturing, animation, effects), and post-production (lighting, rendering, compositing, sound, delivery).
Q: How long does it take to produce a 3D animation?
A professional 60 to 90-second 3D animated explainer typically takes between eight and twelve weeks from initial brief to final delivery. Longer brand films and product animations requiring high visual complexity may take twelve to twenty weeks. Timelines are primarily determined by the complexity of the models, the number of shots, and the visual quality target.
Q: What is the most expensive stage of animation production?
Rendering is typically the most resource-intensive stage in terms of computational cost, but the animation and rigging stages are usually the most expensive in terms of artist hours. High-quality character animation requires skilled artists working for extended periods to produce the kind of performance quality that makes animated characters feel believable.
Q: What is the difference between 3D animation production and 2D animation production?
The fundamental difference is dimensionality. 3D animation builds virtual objects and characters in a three-dimensional space and simulates a camera moving through that space. 2D animation creates flat artwork and moves it within a two-dimensional plane. 3D animation typically requires more upfront technical setup (modeling, rigging) but is more flexible for camera movement and environmental complexity. 2D animation is often faster for character-driven, stylized content.
Q: Do I need to understand the pipeline to commission 3D animation?
You do not need deep technical knowledge, but understanding the basic stages and their sequence makes you a better client. You will know where to invest your review attention, what questions to ask at each stage, and why certain changes requested late in production require additional budget. The best client relationships in 3D animation production are built on a shared understanding of how the 3D process works.
You Might Also Like

How Explainer Videos Help Businesses?

The Role of AR/VR in Interactive Storytelling for Children

Why Explainer Videos Are a Must-Have for B2C Sales?

Why Explainer Videos Are Effective?

Why Are Creative Explainer Videos for Internal Business Training and Communication Effective?

How Product Explainer Videos Boost Sales and Customer Understanding?
How AI Explainer Videos Are Transforming Complex Concepts into Simple Ideas Creative
What is the Role of Corporate Explainer Videos in Onboarding and Training?
Why Whiteboard Explainer Videos Are Perfect for Complex Ideas?
How do you find the best studio at low costs for explainer videos in the USA?
Give us your e-mail so
we can give you Update